Visualizzazione post con etichetta pirkka. Mostra tutti i post

martedì 17 giugno 2014

PIRKKA FLOWERS FOR THE WEDDING

Per l'imminente matrimonio della mia cuginetta preferita mi sono offerta di aiutarla per le decorazioni.
Così ha deciso di usare la pirkka per decorare la ringhiera della scala interna di casa sua e il tableau (del quale vi parlerò più avanti).
Per la scala ho realizzato dei fiori molto semplici ma di effetto usando 3 diversi tipi di pirkka sottile ( bianco, rosa cipria e rosa antico).

For the upcoming wedding of my fave cousin I offered to help her with decorations.
She's decided to use pirkka to decorated the banister inside her house and the table plan ( I'll talk about it soon).
For the stairs banister I made simple flowers but of nice effect using 3 different tipes of thin pirkka (white, powder pink and antique pink).


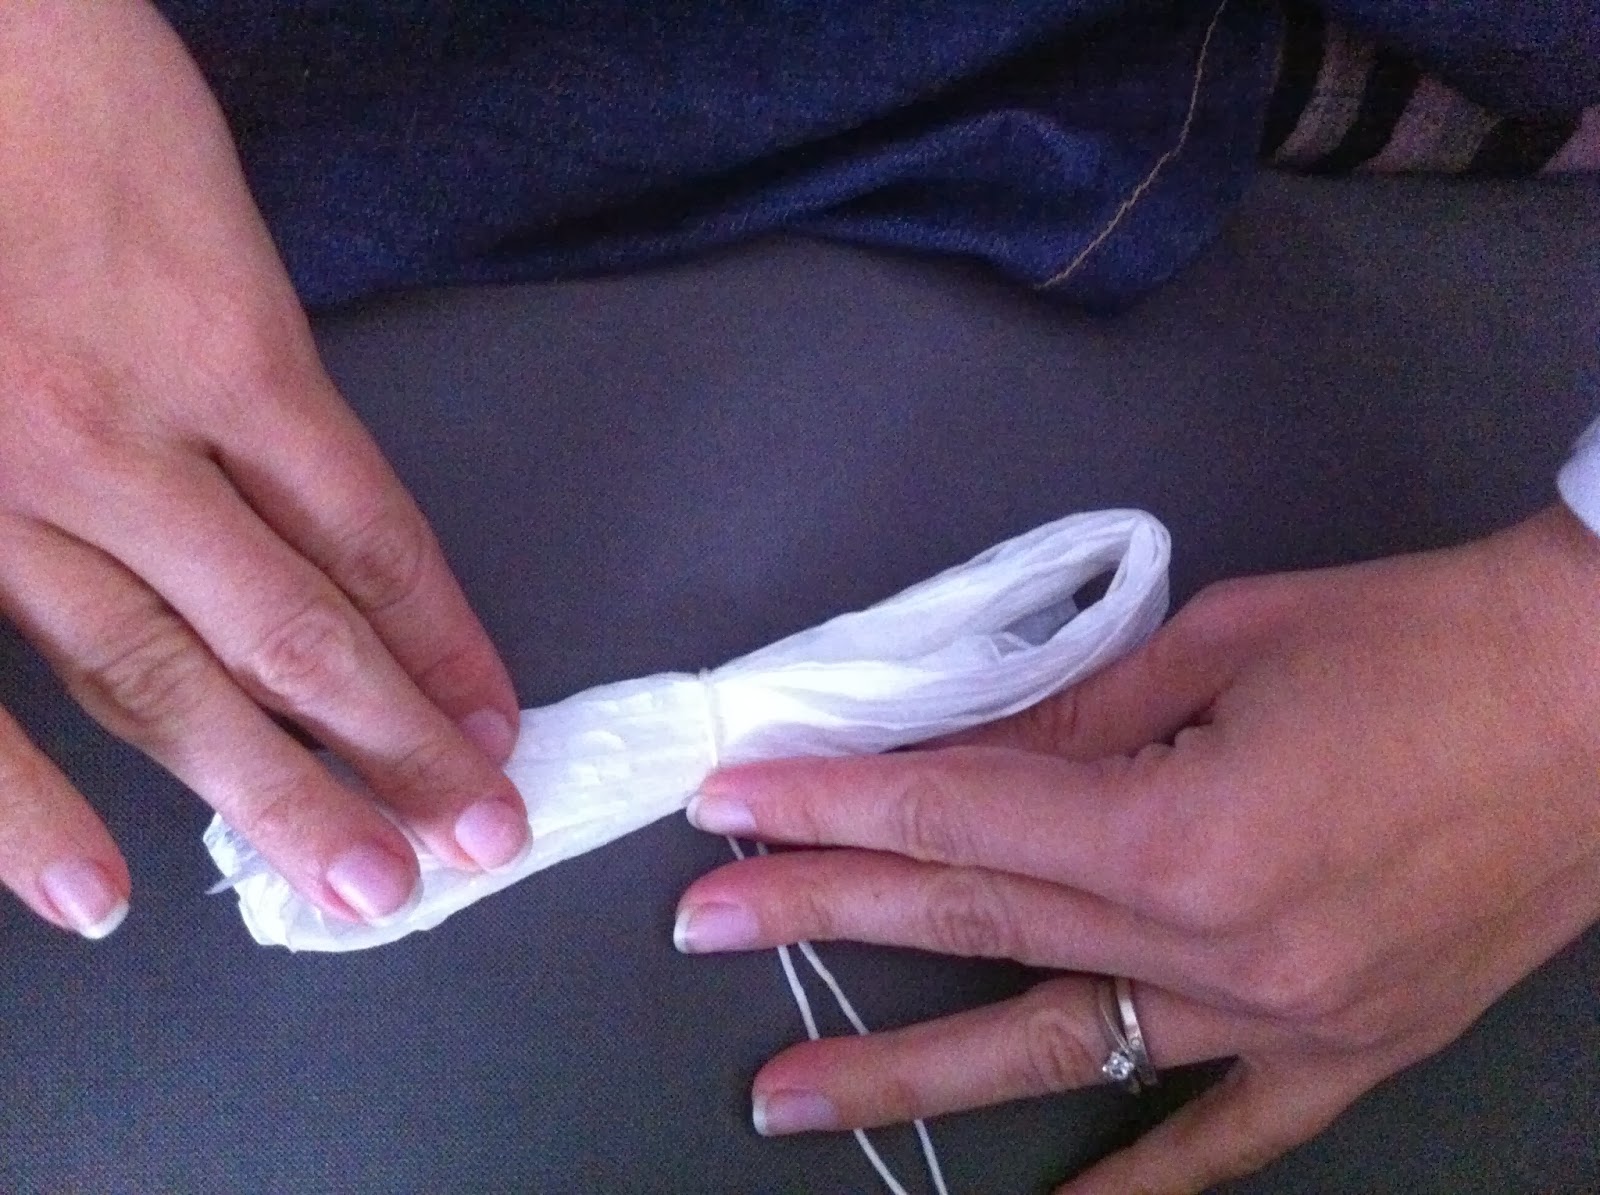
Per ogni colore ho tagliato un pezzo da 2 metri e l'ho aperto, con questo metodo. Per comodità (e anche per averli tutti uguali) ho arrotolato il filo aperto su un libro del Nano e l'ho legato al centro con un pezzo di spago (circa 50 cm). Una volta realizzati tutti i pezzi li ho uniti, uno per tipo, facendo un nodo unico con tutti gli spaghi e ho aperto i petali.

For each colour I cut a 2 mt piece and opened it, with this method. To make the process easier ( and to have them all on the same lenght) I rolled the opened thread up on one of the Kid's book and tied it at the center with some twine ( about 50 cm). Once I made them all I united all the pieces, one each, making a knot including all twines and opened the petals.


Beh, disfare la matassa è un casino!!!
Well, to unravel the tangle is a big mess!!!


La decorazione verrà realizzata avvolgendo della iuta tagliata a strisce di circa 5 cm al corrimano della scala e fissando i fiori di pirkka a distanza regolare.

The decoration will realized wrapping some burlap of around 5 cm around the banister of the stairs and fixing pirkka flowers with a regular distance.


Il matrimonio sarà questo sabato quindi molto presto vedrete il risultato finale!!! Ale

The wedding it's going to take place this saturday so I'll let you soon see the final result!!! Ale

P.S.:assicuratevi di seguirci su FACEBOOK e su BLOGLOVIN'!!!
P.S.:make sure you follow us on FACEBOOK and BLOGLOVIN'!!!

venerdì 30 maggio 2014

PIRKKA- how to work with it

Eccoci tornati alla pirkka!! Spero che l'introduzione della volta scorsa vi sia piaciuta! Oggi parliamo di qualche nozione sulla lavorazione di questo materiale.

La prima cosa da imparare è il taglio. Personalmente trovo che il modo migliore per tagliare tanti pezzi della stessa misura è realizzare una matassa avvolgendo il filo attorno ad un pezzo di cartone lungo la metà di quella desiderata e tagliare poi da una sola parte.

Here we are back talking about pirkka!! I hope you liked last time's introduction! Today we're talking about some notion on how to work with this material.

The first thing to learn is how to cut it. Personally I think that the best way to cut lots of pieces of the same measure is to create a skein wrapping the thread around a piece of cardboard with half the lenght of the one you want and then cut only on a side.


Questo metodo non funziona con il filo macro e quello vite perchè sono troppo spessi. In tal caso bisogna armarsi di metro e pazienza: io taglio un primo pezzo che uso poi come guida per tagliare tutti gli altri. E' consigliabile, per il filo vite, usare forbici molto affilate o dividere i vari capi prima di tagliare.

Altra fondamentale pratica per la pirkka è l'apertura. Io uso sempre quella fatta a mano. Semplicissima: basta girare il filo in senso contrario a quello in cui è arrotolato.
Esistono altri due modi per aprire la carta: per immersione o a spruzzo.
Il primo prevede che i pezzi di carta vengano immersi in acqua finchè non si allentano. E' meglio, prima di aprili, tamponarli con un foglio di carta assorbente.
Il secondo invece prevede che il filo venga spruzzato con acqua e chiuso in un sacchetto di plastica per qualche minuto prima di procedere all'apertura.
Sono, però, metodi che non utilizzo e che non consiglio. Preferisco sempre quello a mano!


This method doesn't work on the macro and the vine ones because they're too thick. In this case you need to have lots a patience and a tape measure: I cut the first one with it and then use it as a guide to cut all the others. I suggest, for the vine thread, to use very sharp scissors or to separate all the wires before cutting.

An other important notion is the opening. I usually open it with my hands. Easy peasy: turn the thread in the other way of the way it's turned on itself.
Then there're other two ways: immersion or splashing.
The first one requires that the pieces of paper are immersed in water until they loose up a bit. It's best, prior the opening, to dab them with absorbing paper.
The second method requires that the thread is sprayed with water and closed into a little plastic bag for a couple of minutes before the opening.
Anyway, these are methods that I don't use and that I do not suggest. I always like better the hand opening!


Questa carta è particolarmente adatta alla realizzazione dei fiori. Durante il lavoro potrebbe capitarvi di dover sagomare (è raro ma capita!), è un'operazione da fare con le forbici piccole; oppure di annodare, per realizzare pistilli, bacche, fiori particolari, fissare, chiudere un mazzo per ingrandire alcune parti.
Non mi dilungo sui vari tipi di fiore che potrete realizzare ( altrimenti il post non finirebbe più!!) ma vi dico che in commercio trovate diversi manuali molto ben realizzati (x esempio su amazon ce ne sono molti validi)  che vi illustreranno passo passo come realizzare i vari fiori. Io ne ho tre e devo dire che sono molto utili, e le spiegazioni semplici e precise.

This paper is really good to create flowers. While you're working with it you might end up shaping it (rare but happens!). and it's an operation you should do with small scissors; or to twist it, to create pistils, berries, particular flowers, fixing, closing a bouquet to enlarge some parts.
I'd better not dwell on the variety of flowers you could make (or this post would never end!!) but let me tell you that you can easily find many books really well made ( e.g. on amazon there are lots really good) that will show you how to create flowers step by step. I have these three and I'm grateful I do because they come in handy often, and the explanations are easy and precise.


Un'ultima cosa: la pirkka è adatta anche a realizzare bijoux, elementi decorativi per la casa, bomboniere, addobbi natalizi, piccole borse e tutto quello che la vostra fantasia suggerisce!
A presto! Ale


One last thing: pirkka's really good to create bijoux, decoration for the house, favours for weddings and baptisms, christmas decorations, little purses and all your fantasy suggests!
See you soon! Ale

giovedì 24 aprile 2014

PIRKKA- an introduction

La pirkka ( o filo di carta o filo finlandese) è un particolare tipo di carta, prodotta con cellulosa di abete e tinta con colori sicuri.
Non stinge al sole, non attira la polvere, non si scolorisce in acqua...insomma, è FAVOLOSA!
Viene prodotta in 5 formati e in molti colori, ma viene tinta dopo essere stata arrotolata su sè stessa ( il colore di base può essere bianco o ecrù), così quando si srotola il colore non è mai uniforme, ma possiede bellissime sfumature.

The pirkka ( or finnish wire o paper wire) is a particular kind of paper, produced with fir cellulose and dyed with dark colours.
It doesn't fade in the sun, it doesn't attract dust, it doesn't fade in water... I mean, it's AMAZING!
It's produced in 5 formats and in many colours, but it gets dyed after it has been twisted on itself ( the base colour can be white or ecru), so when it gets untwisted the colour is never uniform, but has beautiful shades.

I formati in cui viene prodotto sono: macro, vite, micro, sottile e piatto. ( nella foto ci sono solo quelli che ho a disposizione al momento a casa!)

The formats produced are: macro, vine, micro, thin and flat. ( in the picture you can see only those that I have in my possession right now!)


Il filo micro, una volta aperto, è di circa 1 cm di spessore, indicato per realizzare bijoux da intrecciare e da lavorare a maglia e all'uncinetto.

The micro wire, once opened, measures 1 cm thickness, good to create bijoux to lace and to crochet or knit.

Il filo sottile, aperto misura circa 2 cm, è il più conosciuto e il primo ad essere stato prodotto. E' adatto a quasi tutti gli utilizzi ma è perfetto per realizzare tutti i dettagli dei fiori.

The thin wire, once opened measures 2 cm, it's the most known and was the first one to be produced. It's good for all the uses but it's perfect to use of the flowers details.

Il filo vite, aperto misura circa 5 cm, è composto da 4 fili intrecciati insieme e viene prodotto su base bianca, su base ecrù e su base bicolore ( 2 fili per tipo).

The vine wire, once opened measures 5 cm, it's made of 4 wires twisted with each other, and it's produced on a white base, ecru base and on a two coloured base (2 wires per kind).

Il filo macro, aperto misura circa 10 cm, è prodotto con filo singolo. Essendo molto spesso ha molte sfumature e può essere utilizzato per realizzare petali molto grossi. E' ideale anche per essere tagliato.

The macro wire, once opened measures 10 cm, it's produced it one wire. Since it's really thick, it has lots of shades and can be used to create big petals. It's the ideal to be cut, too.

Il filo piatto, aperto è di circa 2 cm, non è completamente arrotolato come il filo sottile e i colori sono molto più uniformi.

The flat wire, once opened measures 2 cm, it's not completely twisted like the thin one and the colours are more uniform.

Per lavorare il filo finlandese servono pochi accessori, ma i principali sono forbici robuste (il filo è un pò duro da tagliare) e molta, molta colla! Inoltre un metro, piccoli pennelli, qualche elastico e un punteruolo completeranno il vostro occorrente di base.
Ovviamente se volete usarlo come se fosse cotone vi serviranno uncinetti e/o ferri da maglia!
Io l'ho usato per creare dei centro tavola per il matrimonio di una mia amica qualche tempo fa e me ne sono innamorata talmente tanto che appena mia cugina mi ha detto che si sposava gliel'ho proposto subito!
A presto con la seconda parte di questa introduzione alla pirkka.
Baci Ale!

To work with the finnish wire you won't need many accessories, but the main ones are robust scissors (the wire is a bit thought to cut) and lots and lots of glue! Then you may want to use a ruler (or seamstress one), little markers, some rubber bands and a puncher to finish your base assessories.
If you'll want to crochet or knit with it like it's cotton you may need crochet needles and/or knitting needles!
I used the pirkka some time ago to create centerpieces for one of my friend's wedding and I fell in love with it ever since, so much that, as soon as my cousin told me she was getting married, I proposed it to her immediately!
See you soon for the second part of this pirkka introduction.
XOXO Ale

P.S.:assicuratevi di seguirci su FACEBOOK e su BLOGLOVIN'!!!
P.S.:make sure you follow us on FACEBOOK and BLOGLOVIN'!!!
Related Posts Plugin for WordPress, Blogger...